A rental doesn’t have to look temporary, and it definitely doesn’t have to look cheap.
The truth is, most “expensive-looking” homes aren’t defined by square footage or brand-new renovations, but by a handful of intentional details that create polish and cohesion.
When your lighting feels warm, your windows are styled well, and your finishes match, the whole space reads more high-end—even if you’re working with builder-grade basics and a landlord who hates paint.
The upgrades below are renter-friendly, reversible, and surprisingly affordable, but they deliver the kind of visual payoff that makes guests assume you spent a lot more than you did.
From quick hardware swaps to peel-and-stick miracles, these are the small changes that make a place look styled, elevated, and confidently put together.
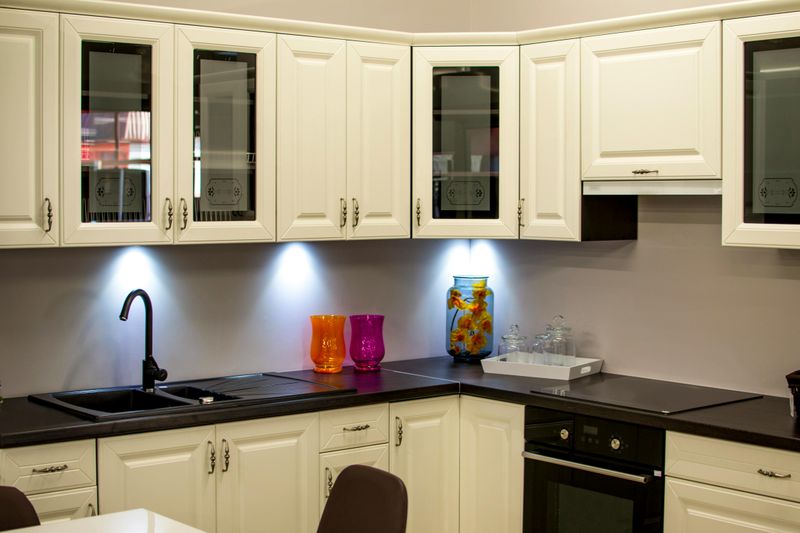
1. Swap in “statement” light fixtures (and keep the originals)
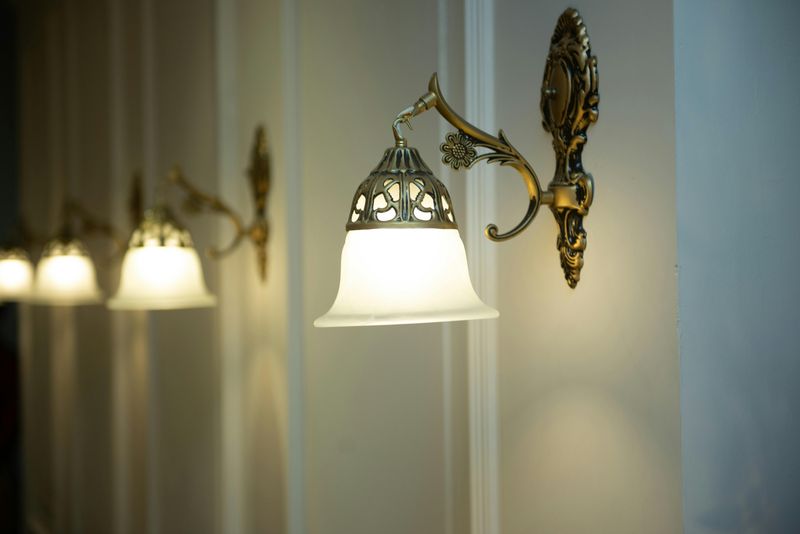
Nothing dates a room faster than a tired “boob light” or a basic frosted dome that casts harsh, flat light.
Swapping in a sculptural pendant or modern flush mount instantly makes your rental look curated, because lighting is one of the first things people notice without realizing it.
Choose a fixture with clean lines, a soft metal finish, or a simple fabric shade, and the entire ceiling area suddenly feels intentional instead of overlooked.
The renter-friendly trick is to keep everything reversible: store the original fixture in a labeled box, take a quick photo of the wiring before you start, and reinstall the old one when you move out.
Even in a small space, one upgraded fixture can read like a renovation.
2. Upgrade switch plates + outlet covers

Small details create the “new and expensive” illusion, and few details scream “older rental” louder than yellowed switch plates with chipped corners.
Replacing them is one of the easiest upgrades you can do in a single afternoon, but it makes your walls look cleaner and your finishes look more consistent.
Screwless plates are especially worth it because they hide hardware and look sleek, the way high-end homes do.
If you want something more design-forward, matte black or brushed brass can make even a plain room feel styled, as long as you repeat the finish elsewhere for balance.
This is also a great fix for spaces where you can’t repaint, because crisp plates make everything around them look fresher.
3. Add floor-to-ceiling curtains (even if the windows aren’t)
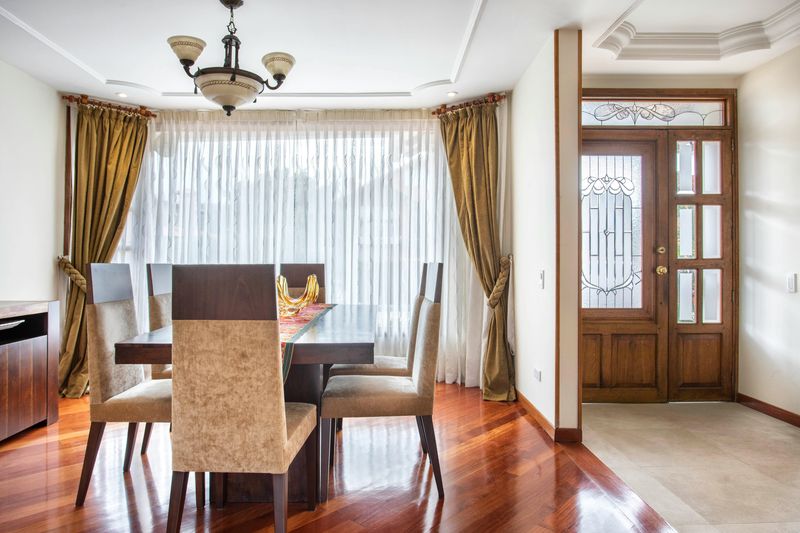
Window styling is a huge part of what separates a “rental look” from a “designer look,” and the easiest upgrade is simply changing how your curtains are hung.
Mounting the rod closer to the ceiling and extending it wider than the window frame makes the window feel larger, the ceiling feel taller, and the entire room feel more intentional.
Thick, longer panels also add softness and texture, which reads expensive in a way thin, short curtains never do.
Linen-look fabrics and pinch-pleat styles are especially convincing if you want that custom, high-end effect.
The best part is that this upgrade is totally reversible: you can use existing holes when possible, patch tiny ones later, and take the curtains with you to the next place.
4. Peel-and-stick backsplash in the kitchen
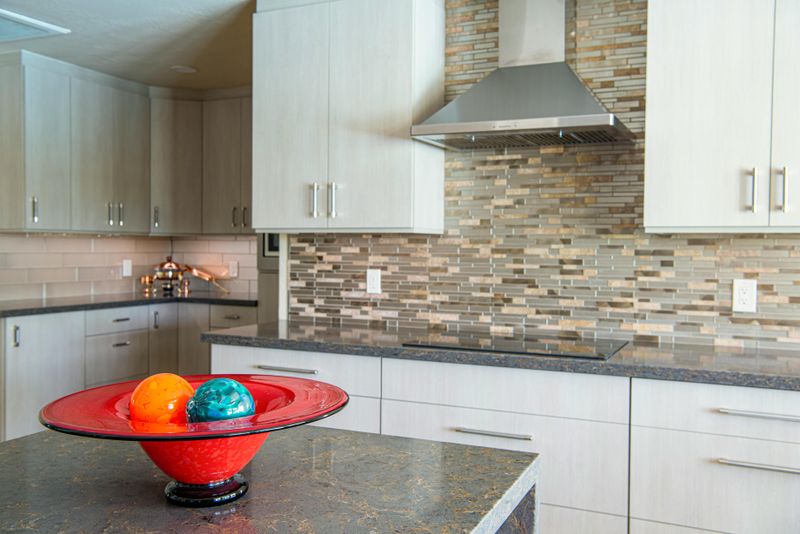
A backsplash is one of those “renovation signals” that people associate with updated, higher-end homes, even if the rest of the kitchen is basic.
Peel-and-stick tile gives you that upgraded look without requiring grout, specialized tools, or a landlord’s permission.
The key is picking a pattern that looks real at a glance, such as subtle marble, slim subway tile, or zellige-inspired designs that have gentle variation.
Before applying, clean the wall thoroughly and let it dry so the adhesive bonds well, then take your time lining up the first row because everything follows that start.
When you’re done, the whole kitchen feels more finished, which makes even inexpensive countertops and cabinets look more intentional and, honestly, more expensive.
5. Peel-and-stick floor tiles or vinyl “rugs” for ugly floors
Bad floors can make an otherwise cute rental feel worn down, and that’s why covering them has such a dramatic impact.
Peel-and-stick tiles work beautifully in bathrooms, entryways, and small kitchens, while vinyl floor “rugs” are a smart option when you want coverage without committing to a full tile layout.
A classic checkerboard, warm stone look, or concrete-style finish instantly gives the impression of a more updated space, especially if the original floor is scratched linoleum or outdated tile.
Focus on clean edges and careful alignment so it looks intentional rather than temporary.
Most options lift later with patience and a little heat, which makes this a renter-friendly way to erase the biggest visual downgrade in your home without actually renovating anything.
6. Replace cabinet hardware (or add it if you have none)
Cabinet pulls may seem minor, but they function like jewelry for your kitchen and bathroom, and upgrading them changes the entire vibe.
Builder-grade knobs can make cabinets look older than they are, while coordinated pulls in a modern finish instantly create that “updated” impression people associate with more expensive homes.
Matte black is clean and contemporary, brushed brass feels warm and elevated, and polished nickel gives a classic, slightly luxe look that works with almost any style.
If you’re swapping existing hardware, the process is quick: measure the hole spacing, order the right size, and keep the old pieces in a bag for move-out.
If you’re adding hardware to blank cabinets, use removable solutions or be prepared to patch holes later.
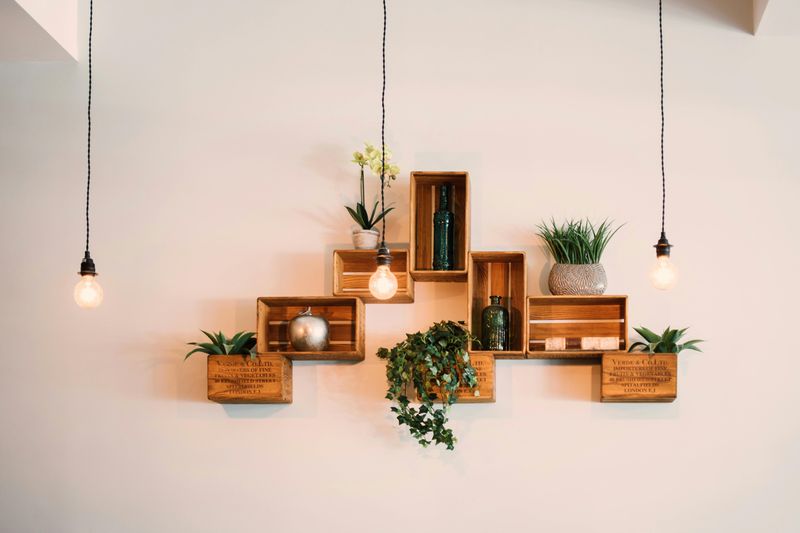
7. Create a “built-in” look with temporary shelving
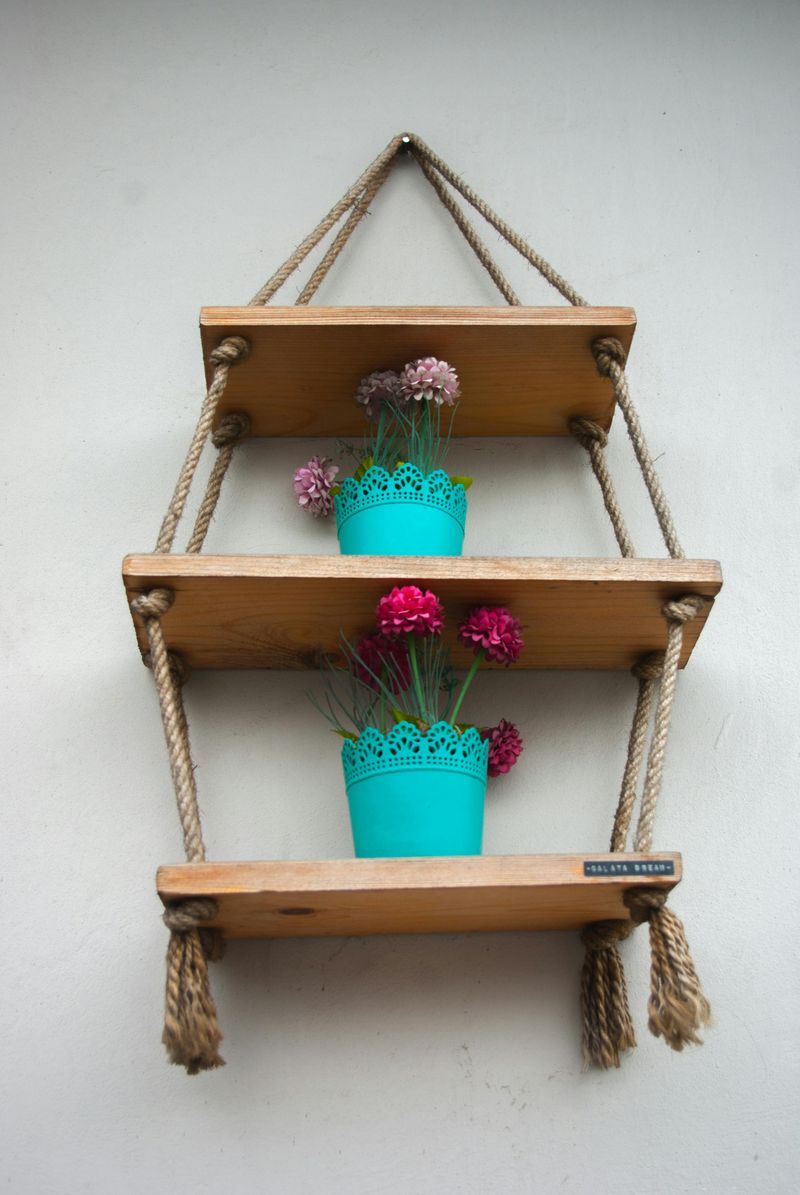
Custom built-ins are a luxury feature, but you can fake that effect in a rental by combining the right shelves and the right styling.
A pair of matching bookcases placed side by side can look intentional when you add baskets, stacked books, and a few decorative objects that repeat colors from the rest of the room.
Floating shelves can also work if you use renter-friendly anchors and keep the layout symmetrical, because symmetry reads “planned” and expensive.
The secret is avoiding clutter, since built-ins look high-end when they feel edited rather than stuffed.
Add one or two framed prints, a small lamp for warmth, and storage pieces that hide everyday mess, and the whole wall suddenly feels like a design feature rather than just furniture.
8. Use oversized art (or “frame” big prints)
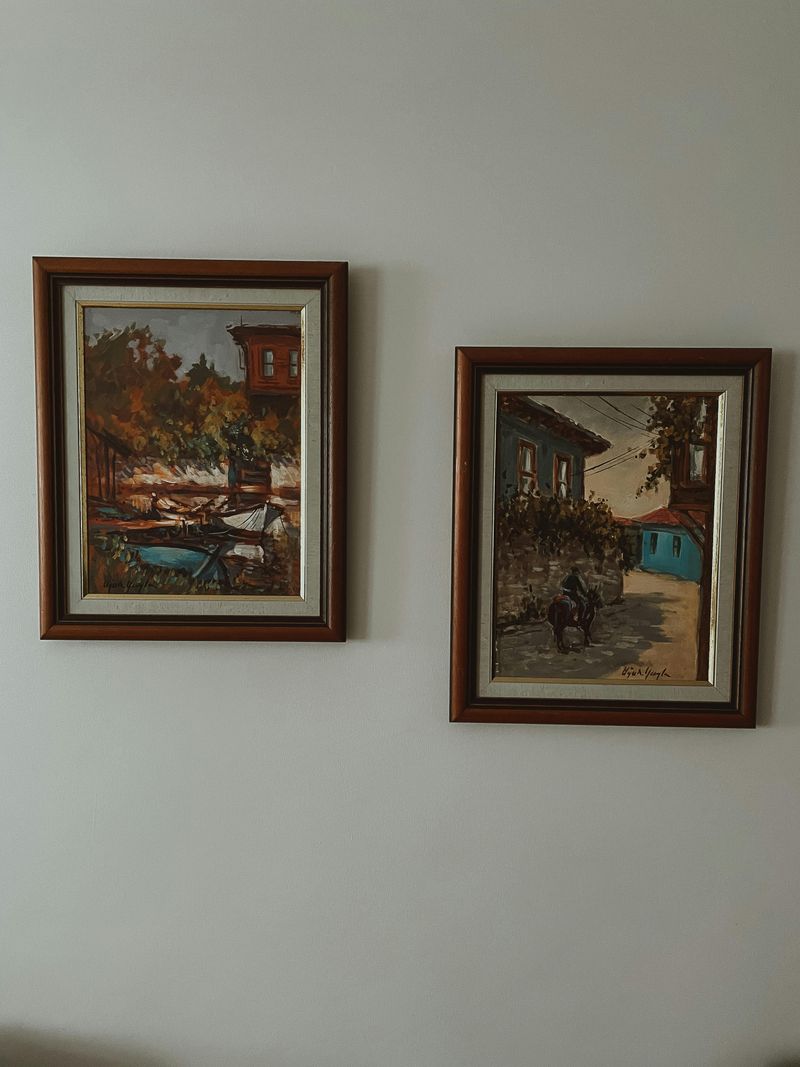
High-end spaces almost always include art that feels intentional, and the quickest way to get that look is going bigger than you think you should.
One oversized piece creates a focal point that makes the room feel finished, while lots of tiny frames can look scattered unless you’re very careful.
If original art isn’t in the budget, you can still get a luxe result with downloadable prints, enlarged photography, or even fabric and wallpaper samples placed inside thrifted frames.
A large frame with a wide mat looks especially polished and can make inexpensive prints feel gallery-like.
To keep it renter-friendly, hang pieces with removable hooks or picture rails, and aim for a consistent color palette so the art feels connected to the rest of the room instead of random.
9. Make the space feel upscale with layered lighting
Expensive homes rarely rely on a single overhead light, because layered lighting creates depth and mood that instantly feels more luxurious.
Combining a floor lamp, a table lamp, and a warm ambient source like a plug-in sconce makes your space look thoughtfully designed, even if the furniture is simple.
The warmth matters just as much as the number of lights, so choose soft white bulbs and keep the color temperature consistent throughout the room.
Smart plugs or dimmable bulbs are a renter-friendly bonus because they let you adjust the vibe without rewiring anything.
When the lighting feels gentle and flattering, everything else looks better too, from wall color to decor, which is why this upgrade has such a high-impact, “expensive” payoff.
Comments
Loading…